As I explained in my very first post, I’ve been playing around with jeedom to set-up home automation. As usual I started with a leftover PI3 I had at hand and ended up buying several hundreds of accessories to extend it.
They’re selling a ready-made box, the Jeedom Mini+ Box, but I always preferred to play with my own toy anyway. Considering that they’re offering different installation modes I immediately liked the product:
- Raspberry PI
- Jeedomboard (their own box)
- docker running on a synology
- In a VM
- On docker
Step 1 - Install the Raspberry PI
Restore the image
So easy enough, download the image and restore it on the micro-SD card you’ll insert in the PI3. Plug your PI and bingo it works and is accessible on the network providing that you have a DHCP server as the base Jeedom image is configured for dynamic IP.
Perform some initial set-up at OS level
Resize the SD card
My SD card being 16 Gb I had to resize the partition with the tool raspi-config.
So connect via SSH (the out-of-the-box SSH user credentials are jeedom/Mjeedom96), launch raspi-config and choose the option Expand Filesystem and here you go.
ssh jeedom@jeedom.local
sudo raspi-config

┌──────────────────────────────┤ Raspberry Pi Software Configuration Tool (raspi-config) ├───────────────────────────────┐
│                                                                                                                        │
│          1 Expand Filesystem            Ensures that all of the SD card storage is available to the OS                 │
│          2 Change User Password         Change password for the default user (pi)                                      │
│          3 Boot Options                 Choose whether to boot into a desktop environment or the command line          │
│          4 Wait for Network at Boot     Choose whether to wait for network connection during boot                      │
│          5 Internationalisation Options Set up language and regional settings to match your location                   │
│          6 Enable Camera                Enable this Pi to work with the Raspberry Pi Camera                            │
│          7 Add to Rastrack              Add this Pi to the online Raspberry Pi Map (Rastrack)                          │
│          8 Overclock                    Configure overclocking for your Pi                                             │
│          9 Advanced Options             Configure advanced settings                                                    │
│          0 About raspi-config           Information about this configuration tool                                      │
│                                                                                                                        │
│                                                                                                                        │
│                                   <Select>                                   <Finish>                                  │
│                                                                                                                        │
└────────────────────────────────────────────────────────────────────────────────────────────────────────────────────────┘
Reboot the PI3 and you’re ready to continue with the initialisation of Jeedom.
Secure the box
As usual I’ll create my own user with a more secured password, set-up transparent SSH with a public RSA key and delete the old out-of-the-box user.
Below the command line instructions:
# Change password of user jeedom
passwd jeedom
# Create a new user
sudo adduser newuser
# Grant Users Administrative Privileges
sudo visudo
# Add the below line to the file, which opened
fxmartin ALL=(ALL:ALL) ALL
# Copy the RSA public key to allow transparen and secure SSH
ssh-copy-id -i .ssh/id_rsa.pub jeedom.local
Step 2 - Configure Jeedom
The default admin credentials are admin/admin. After having created a profile on their market you can connect to your local jeedom and follow the first steps. Their documentation is extremely well done.
In an abbreviated way, the actions I performed:
- Set-up the already install Z-wave plugin
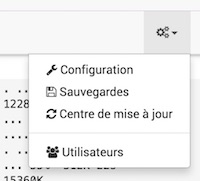
- Update Jeedom through the Update center
- Change the admin password
- Set-up a first Z-wave device to test (FIBARO eye)
- Install and set-up RFXCOM plug-in
- Install and set-up Netatmo plugin
- Install and set-up Squeezebox plugin